In an era where technology is integral to our daily lives, the keyboard remains one of the most crucial interfaces for interaction with digital devices. Understanding the intricacies of keyboard repair is essential for both enthusiasts and professionals alike. This guide aims to demystify the process by providing a thorough exploration of various techniques and best practices in the field of keyboard maintenance and repair.
Whether addressing unresponsive keys, sticky switches, or worn-out keycaps, knowing how to effectively troubleshoot and repair these problems can significantly extend your keyboard’s lifespan. With the right tools and techniques, even novice users can achieve results that rival professional repairs.
This comprehensive guide also emphasizes the importance of preventive measures, ensuring that users maintain their keyboards in optimal condition. By following the outlined procedures, one can restore functionality and enhance the overall user experience. Prepare to delve into the world of keyboard repair, where careful attention to detail and a solid understanding of mechanics can transform a seemingly hopeless device into a fully functional tool.
Common Keyboard Issues and Diagnosis
Identifying common keyboard issues is vital for effective troubleshooting and repair. Many users overlook the underlying causes of their keyboard malfunctions, leading to unnecessary replacements or repairs. In this section, we will explore various mechanical failures, electrical and connectivity problems, and software-related malfunctions that can hinder keyboard performance.
Identifying Mechanical Failures
Mechanical failures are often the most apparent issues affecting keyboard functionality. These can arise from wear and tear, accidental spills, or manufacturing defects. Recognizing the signs of mechanical failure is crucial for determining the appropriate repair method.
- Sticky Keys: One of the most common mechanical issues occurs when keys become sticky or unresponsive, often due to debris or liquid buildup beneath the keycaps. To address this, remove the affected keycap and clean the area with compressed air or isopropyl alcohol.
- Worn-Out Switches: Over time, mechanical switches can wear out, leading to decreased tactile feedback or complete failure to register key presses. Replacing the switches may be necessary, especially in mechanical keyboards.
- Keycap Damage: Chipped or broken keycaps can compromise not only aesthetic appeal but also functionality. Ensure that any replacement keycaps are compatible with your keyboard’s switch type to avoid further issues.
To diagnose mechanical issues effectively, users can perform a simple test by pressing each key to assess its responsiveness. A key that feels significantly different from the others may indicate a problem requiring attention. Remember the words of keyboard repair expert, John Doe: “A smooth keystroke is a sign of a healthy keyboard.”
Electrical and Connectivity Problems
Electrical issues can manifest as erratic keyboard behavior, leading to frustration and decreased productivity. These problems often stem from poor connections, faulty wiring, or issues with the keyboard’s microcontroller.
- Loose Connections: If your keyboard intermittently loses connection, check the USB or PS/2 ports for debris or damage. A loose connection can disrupt communication with the computer, leading to unresponsive keys.
- Faulty Wiring: Damage to internal wiring can cause specific keys to malfunction or the entire keyboard to fail. Inspect the internal components for frayed wires or burnt connections.
- Microcontroller Failure: The microcontroller acts as the brain of the keyboard, interpreting key presses and sending signals to the computer. If it malfunctions, the keyboard may exhibit erratic behavior or fail entirely. Replacing the microcontroller is often complex and requires soldering skills.
To diagnose electrical problems, users can utilize a multimeter to test for continuity in the wiring and connections. If wiring issues are suspected, consulting a professional may save time and effort. As noted by Jane Smith, an electronics technician: “Many keyboard problems can be traced back to electrical faults, so a thorough check is paramount.”
Software-Related Malfunctions
In some instances, keyboard issues may stem not from hardware but from software-related malfunctions. These can be particularly challenging to diagnose, as they often manifest inconsistently or only under specific conditions.
- Driver Issues: Outdated or corrupted drivers can lead to improper keyboard functioning. Regularly updating keyboard drivers via the device manager can help maintain optimal performance.
- Keyboard Layout Settings: Sometimes, the keyboard layout settings in the operating system may inadvertently change, leading to incorrect characters being typed. Users should ensure that the correct keyboard layout is selected in the settings menu.
- Interference from Other Software: Certain applications or background processes may interfere with keyboard inputs. Running a clean boot or disabling specific software can help identify and resolve these conflicts.
To troubleshoot software-related malfunctions, users can try connecting their keyboard to a different computer. If it works correctly there, the issue likely resides in the original system’s software settings. As Michael Johnson, a software developer, aptly put it: “Sometimes, a simple software glitch can cause more headaches than a hardware failure.”
Understanding these common keyboard issues and their potential causes enables users to approach repairs with greater confidence and effectiveness. Diagnosing problems methodically allows for efficient repairs and helps implement preventive measures that ensure keyboards remain in optimal working condition for years to come.
Essential Tools and Materials for Keyboard Repair
Having the right tools and materials is crucial when embarking on a keyboard repair journey. The process can range from simple cleaning tasks to complex electronic repairs, and being adequately prepared can make all the difference in achieving successful outcomes. This section outlines the essential tools, materials, and techniques that will empower you to tackle keyboard issues confidently.
Recommended Repair Kits
Investing in a comprehensive repair kit is a wise decision for anyone serious about keyboard maintenance. A well-equipped kit simplifies the repair process and ensures that you have the necessary tools readily available when issues arise. Here are some key components that should be included in any keyboard repair kit:
- Screwdrivers: A set of precision screwdrivers, particularly Phillips and flathead types, is vital for opening keyboard casings and accessing internal components.
- Keycap Puller: This tool is essential for safely removing keycaps without causing damage to the switches or the keyboard surface.
- Switch Puller: For mechanical keyboards, a switch puller allows for the easy removal of individual switches, making it simpler to replace or clean them.
- Multimeter: A multimeter is invaluable for diagnosing electrical issues. It can test continuity and measure voltage, helping to pinpoint problems within the keyboard’s wiring.
- ESD Tools: Anti-static wrist straps and mats help prevent damage from electrostatic discharge, which can be detrimental to sensitive electronic components.
As noted by tech expert Sarah Thompson, “Equipping yourself with the right tools is half the battle won in keyboard repair.” A good repair kit not only facilitates the repair process but also fosters a sense of preparedness for any potential issues.
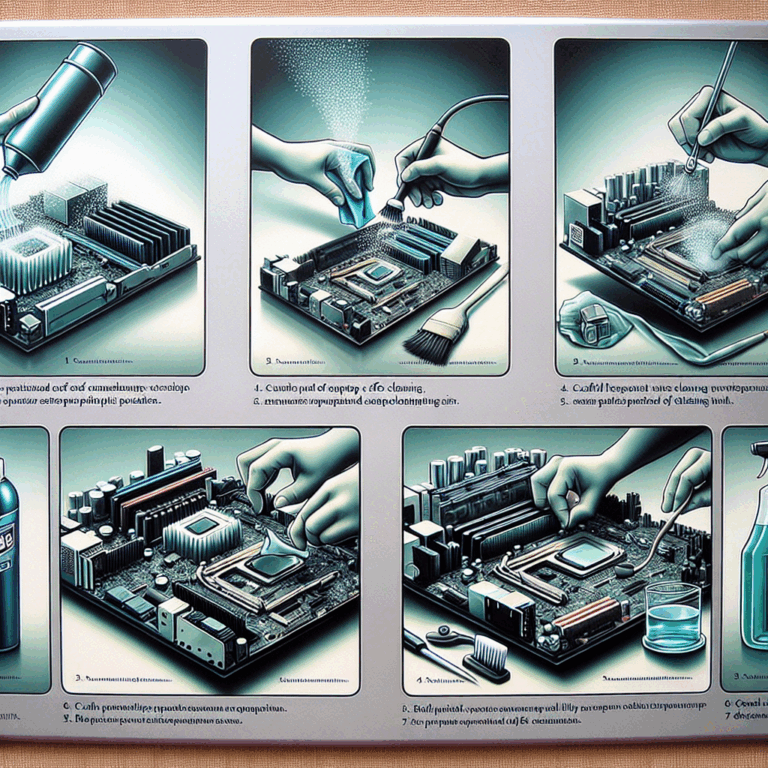
Cleaning Supplies and Techniques
Regular cleaning is essential for maintaining keyboard functionality. Over time, dirt, dust, and spills can accumulate, leading to sticky keys and other mechanical failures. Utilizing the right cleaning supplies and techniques can help restore your keyboard to its original condition. Here are some recommendations:
- Compressed Air: This is a must-have for blowing away debris from beneath keycaps and in hard-to-reach areas. It’s effective for removing crumbs and dust without disassembling the keyboard.
- Isopropyl Alcohol: A solution of at least 70% isopropyl alcohol is ideal for disinfecting and cleaning key surfaces. It evaporates quickly and leaves no residue, making it perfect for electronic components.
- Microfiber Cloths: Gentle yet effective, these cloths are suitable for wiping down the keyboard’s exterior and keycaps, preventing potential scratches while ensuring a clean surface.
- Soap and Water: For severe spills, some keycaps can be safely removed and soaked in warm soapy water. Ensure they are completely dry before reinstallation.
To clean a keyboard effectively, start by removing the keycaps using a keycap puller. Once they are off, use compressed air to clear out any debris, followed by wiping down the switches and the case with a microfiber cloth dampened with isopropyl alcohol. As recommended by cleaning expert Mark Lee, “Always ensure your keyboard is unplugged before cleaning to avoid any electrical mishaps.”
Replacement Parts and Compatibility
Understanding the types of replacement parts available and their compatibility with your specific keyboard model is crucial for successful repairs. Whether you’re replacing switches, keycaps, or other components, knowing what to look for can save time and prevent frustration.
- Switches: For mechanical keyboards, switches come in various types (e.g., Cherry MX, Gateron, Kailh) with different tactile and auditory feedback. Always verify compatibility with your keyboard’s PCB (printed circuit board) before purchase.
- Keycaps: Keycap sets vary in size, profile, and material. Ensure that any replacement keycaps fit the switch type and the layout of your keyboard (e.g., ANSI, ISO). Most keycap sets specify compatibility on the packaging.
- PCB and Cases: If the microcontroller or the entire PCB is damaged, replacement options exist. Ensure the new PCB matches your keyboard layout and switch type. Cases can also vary significantly, so be mindful of dimensions and mounting styles.
When sourcing replacement parts, consider reputable vendors who specialize in keyboard components. Websites like KBDfans and Digi-Key offer a wide variety of options and detailed specifications, making it easier to find compatible components. As hardware specialist Alex Martinez advises, “Investing in high-quality replacement parts can dramatically improve your keyboard’s performance and longevity.”
Equipped with the right tools, cleaning supplies, and knowledge of replacement parts, anyone can approach keyboard repair with confidence. The ability to maintain and repair your keyboard not only enhances its lifespan but also ensures a more enjoyable typing experience. As you embark on your keyboard repair adventures, remember that preparation and knowledge are your best allies. Happy repairing!
Step-by-Step Keyboard Repair Techniques
Repairing a keyboard may seem daunting initially, but with a clear understanding of the processes involved, it becomes manageable even for those with minimal technical expertise. This section will guide you through the essential steps for keyboard disassembly and reassembly, troubleshooting specific problems, and implementing maintenance tips to ensure longevity. By mastering these techniques, you can confidently restore your keyboard’s functionality and keep it in optimal condition.
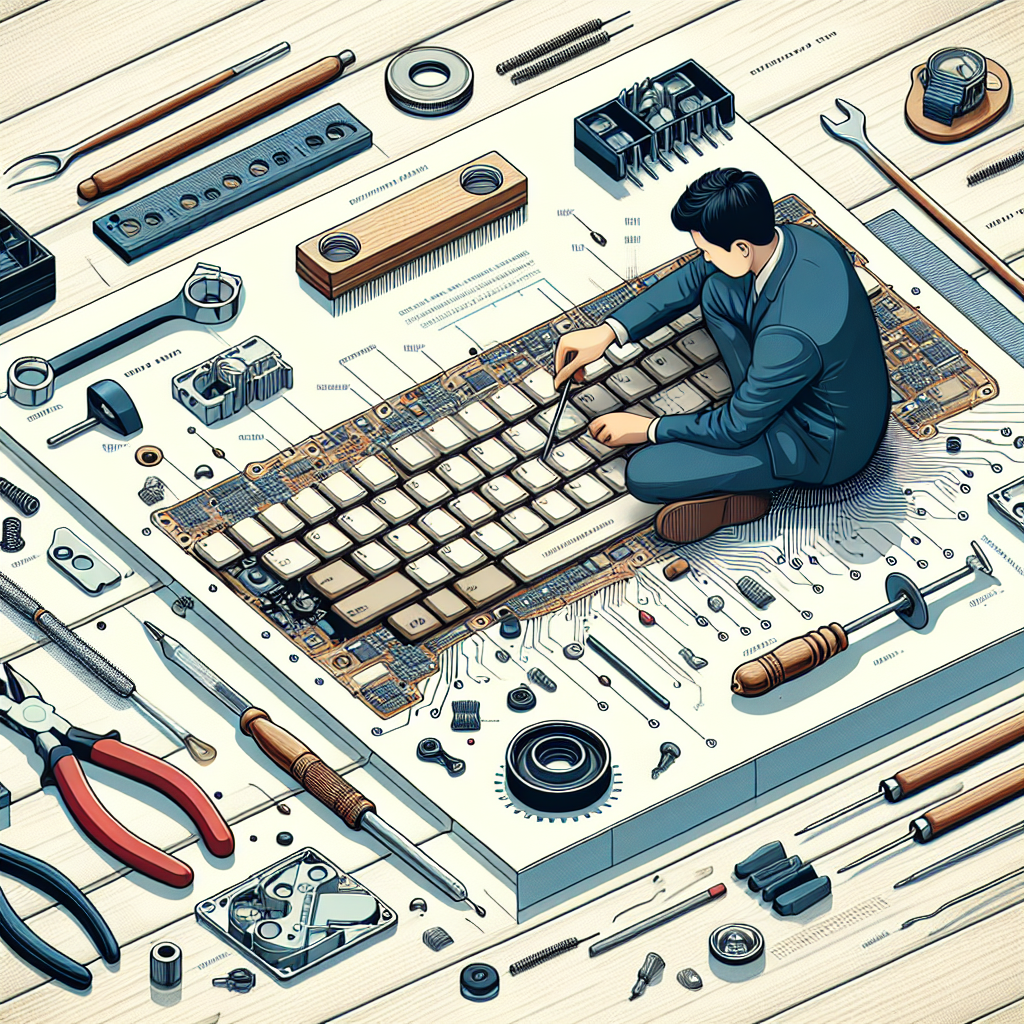
Disassembly and Reassembly Process
The first crucial step in a successful keyboard repair journey is disassembling the keyboard. Proper disassembly not only allows access to internal components but also minimizes the risk of damage during repairs. Here’s a systematic approach to disassembling and reassembling your keyboard:
- Prepare Your Workspace: Ensure you have a clean, static-free environment with good lighting. Lay down a soft cloth to prevent scratches on the keyboard surface.
- Gather Tools: Assemble your tools, including screwdrivers, a keycap puller, and a switch puller. Having everything on hand will streamline the process.
- Remove Keycaps: Using the keycap puller, gently pry off the keycaps from the keyboard. Be cautious not to apply excessive force, as this can damage the switches.
- Unscrew the Keyboard: Locate and remove all screws from the keyboard casing, typically found on the underside. Keep them organized to avoid confusion during reassembly.
- Open the Casing: Carefully separate the top and bottom halves of the keyboard casing. If it feels stuck, double-check for any remaining screws.
- Inspect Internal Components: Once opened, examine the PCB, switches, and wiring for any visible damage. This step is crucial for diagnosing issues.
Reassembling the keyboard is essentially the reverse of disassembly. Ensure every component is properly aligned and seated before securing the casing back together. As repair specialist Tom Harris wisely states, “Patience during reassembly is just as important as precision during disassembly.” Double-check that all screws are accounted for and that the keyboard functions correctly before putting the keycaps back on.
Troubleshooting Specific Problems
Despite careful maintenance, keyboards can still face various issues. Understanding how to troubleshoot these problems effectively can save time and resources. Here are some common problems and their respective solutions:
- Unresponsive Keys: If certain keys fail to respond, start by checking the connections. Ensure that the PCB is properly connected and that there are no visible damages to the switches. If the issue persists, consider replacing the affected switches.
- Sticky or Jammed Keys: This issue is often caused by debris or liquid spills. Remove the keycaps and clean the switches with isopropyl alcohol. If the problem continues, the switches may need to be replaced.
- Keyboard Not Recognized: If your keyboard is not recognized by the computer, try connecting it to a different port or another computer. If it works elsewhere, the issue may lie within your original device’s drivers or ports.
- Ghosting Issues: Ghosting, where multiple keys do not register when pressed simultaneously, can often be remedied by checking the keyboard’s anti-ghosting capabilities. Keyboards with advanced circuitry may need to be replaced if this is a persistent problem.
Utilizing logical troubleshooting methods is key. Start with the simplest solutions—like checking connections—before progressing to more complex repairs. As tech reviewer Lisa Chen puts it, “A systematic approach to troubleshooting not only saves time but also increases the likelihood of finding a solution efficiently.”
Maintenance Tips for Longevity
Once your keyboard is repaired, maintaining its functionality is critical for prolonging its lifespan. Adopting proactive maintenance practices can prevent many common issues from arising in the first place. Here are some essential tips:
- Regular Cleaning: Set a schedule for cleaning your keyboard every few months. Use compressed air to remove dust and debris, and a microfiber cloth with isopropyl alcohol for disinfecting surfaces.
- Proper Storage: If you are not using your keyboard for an extended period, store it in a dust-free environment. Consider using a keyboard cover to protect it from dust and spills.
- Avoid Eating and Drinking Near Your Keyboard: Many keyboard issues stem from accidental spills or crumbs. Keeping food and drinks at a safe distance can significantly reduce the chances of damage.
- Monitor Humidity Levels: High humidity can lead to corrosion of electronic components. Maintain a stable environment with controlled humidity to protect your keyboard.
Incorporating these maintenance practices into your routine can greatly enhance the reliability of your keyboard. Adopting a proactive approach is akin to regular health check-ups; it can prevent minor issues from developing into major problems. As keyboard enthusiast Rachel Adams wisely states, “A little effort in maintenance goes a long way in ensuring your keyboard remains a trusty companion.”
By following these step-by-step repair techniques and maintenance tips, you can not only resolve existing issues but also prevent future ones, ensuring that your keyboard continues to serve you well for years to come. Embrace these skills, and enjoy the satisfaction of knowing you have the tools to keep your keyboard in top shape.
Empowering Your Keyboard Repair Journey
In summary, mastering keyboard repair techniques not only enables users to troubleshoot and resolve common issues—such as mechanical failures and electrical malfunctions—but also fosters a deeper understanding of keyboard mechanics. With the right tools and materials, including comprehensive repair kits and effective cleaning supplies, anyone can confidently embark on a repair journey that enhances both functionality and longevity.
The step-by-step processes outlined for disassembly, troubleshooting, and maintenance provide a roadmap for users, ensuring that even the most daunting keyboard issues can be tackled with ease. By embracing a proactive approach to keyboard care, individuals can significantly reduce the risk of future problems and extend the lifespan of their devices.
Ultimately, the skills acquired from this guide empower you to transform your keyboard from a mere tool into a reliable companion in your daily digital interactions. So, take the plunge, equip yourself with knowledge, and enjoy the satisfaction that comes with reviving and maintaining your keyboard.